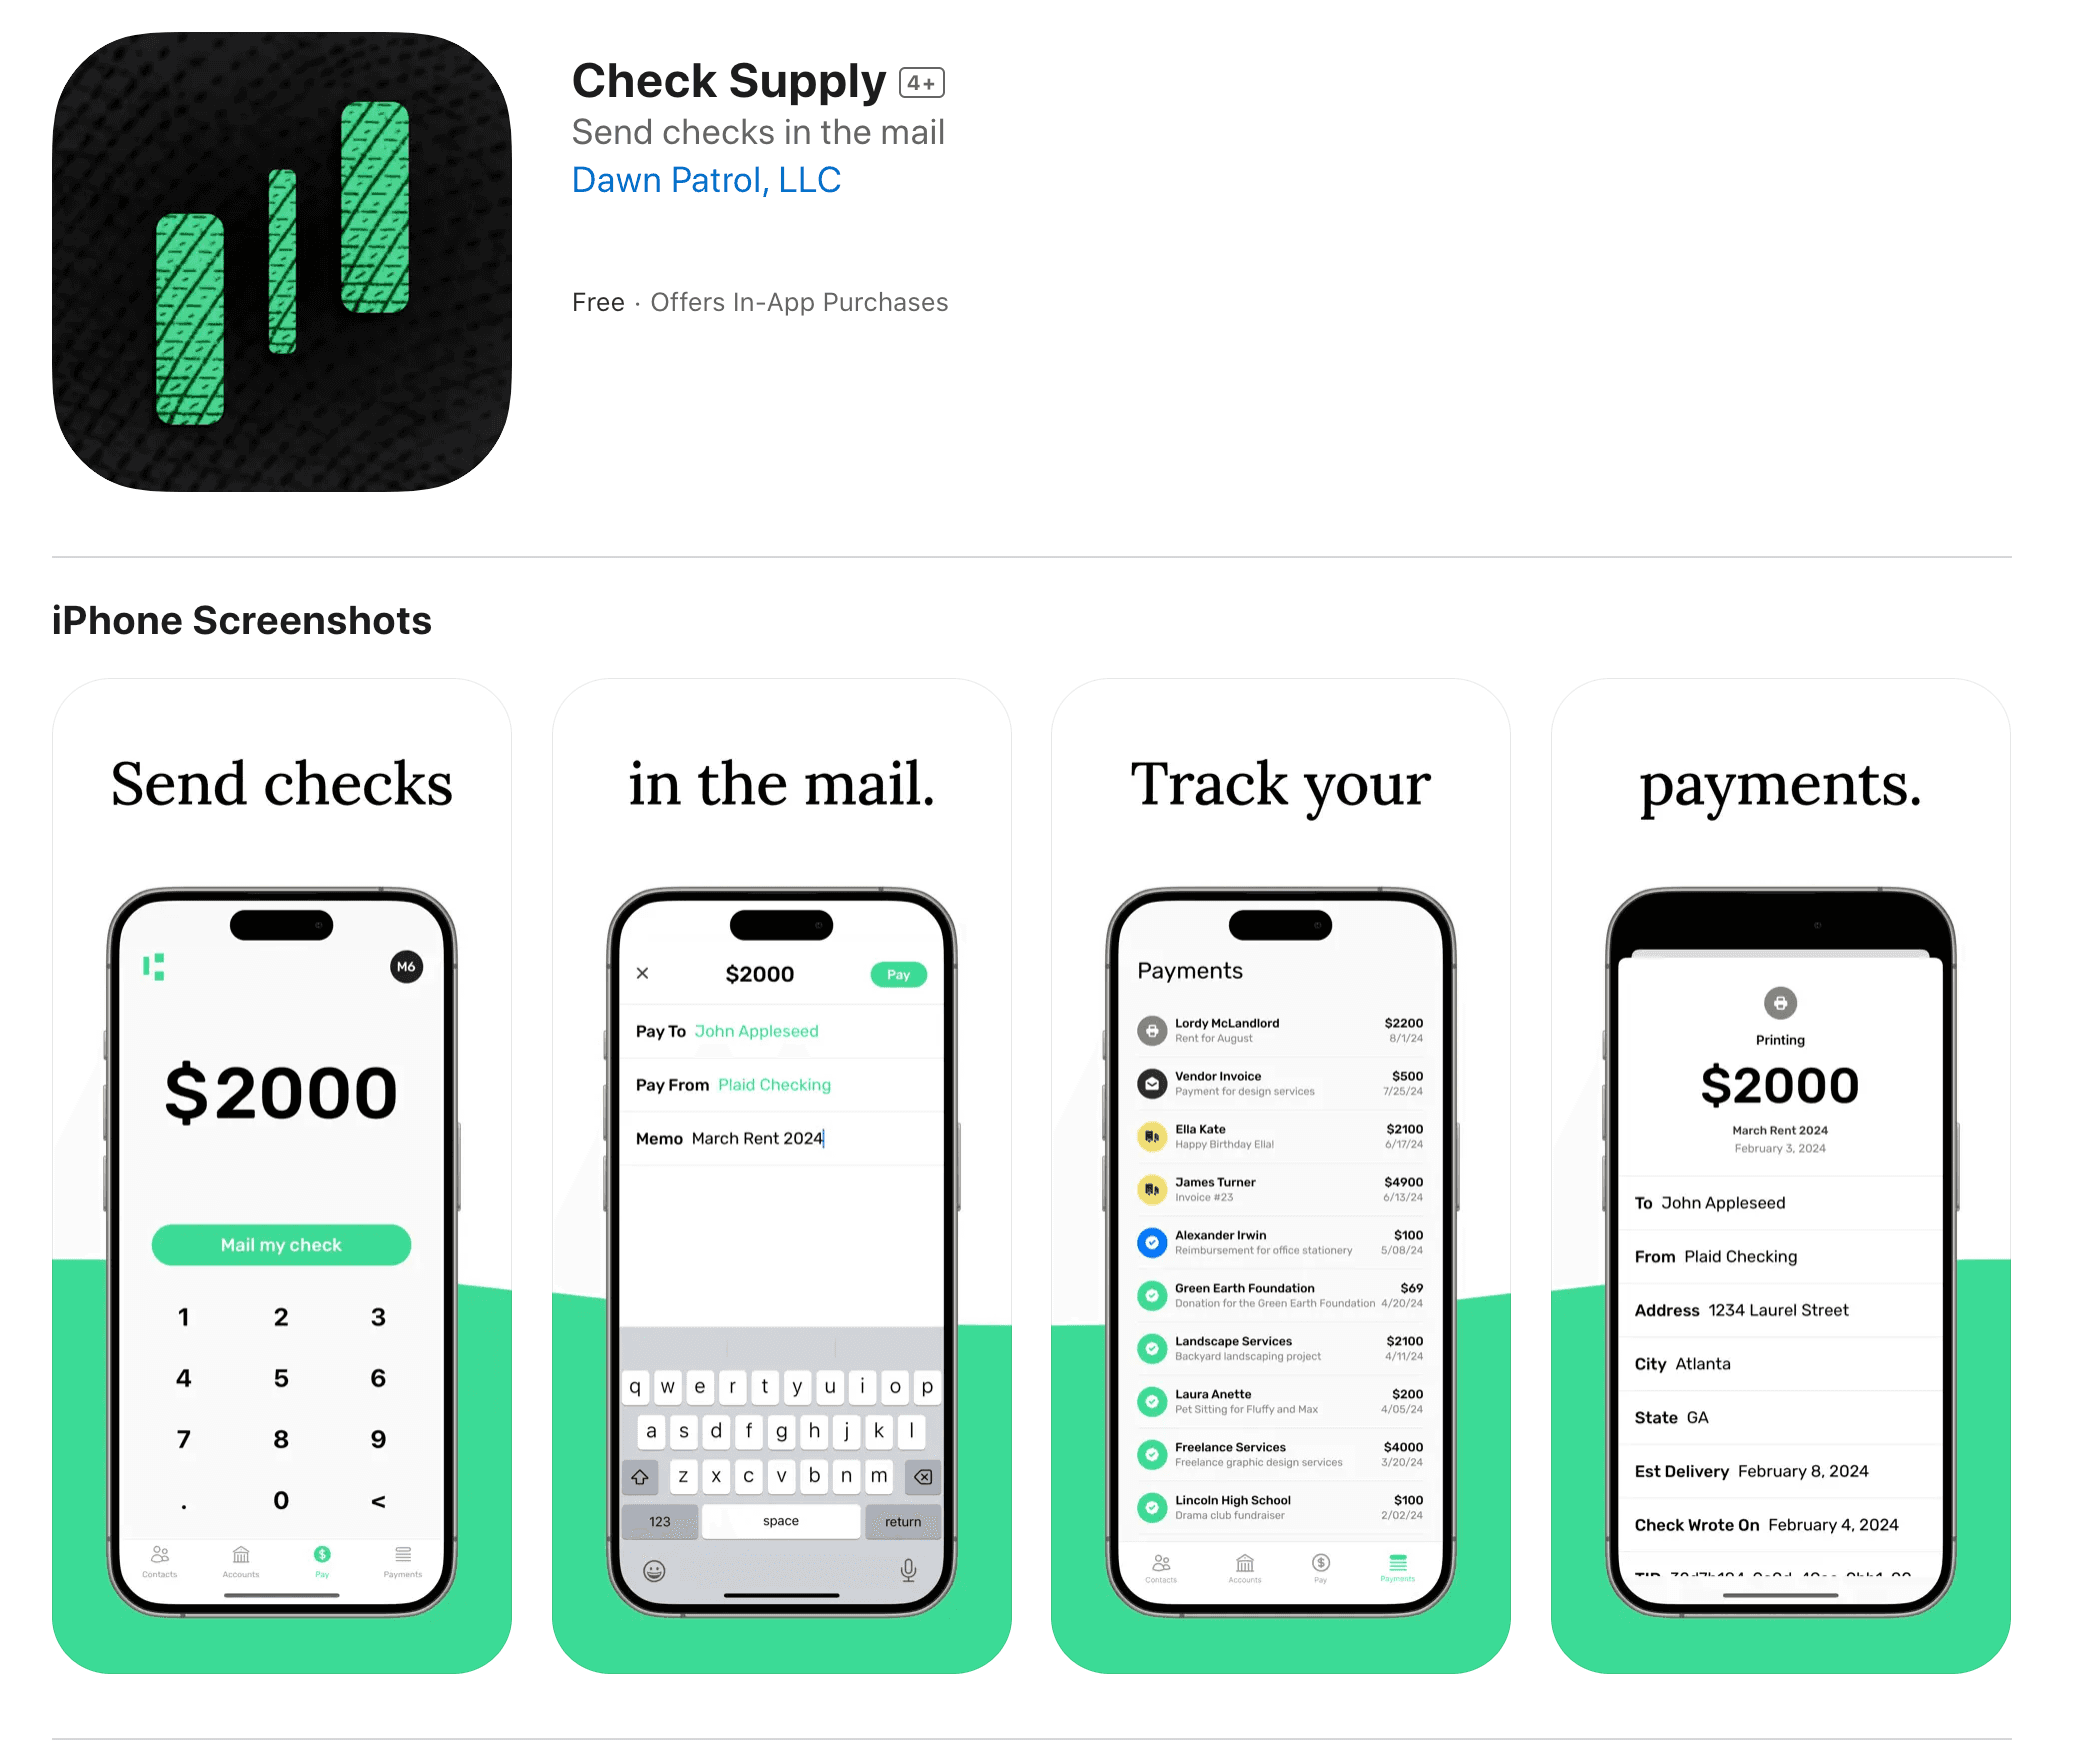
How to mail a check from your iPhone
The fastest way to mail a check from your phone with the least amount of hassle
01Download Check Supply.
Download Check Supply from the App Store. After the app is installed, open it and create or sign in to your account.
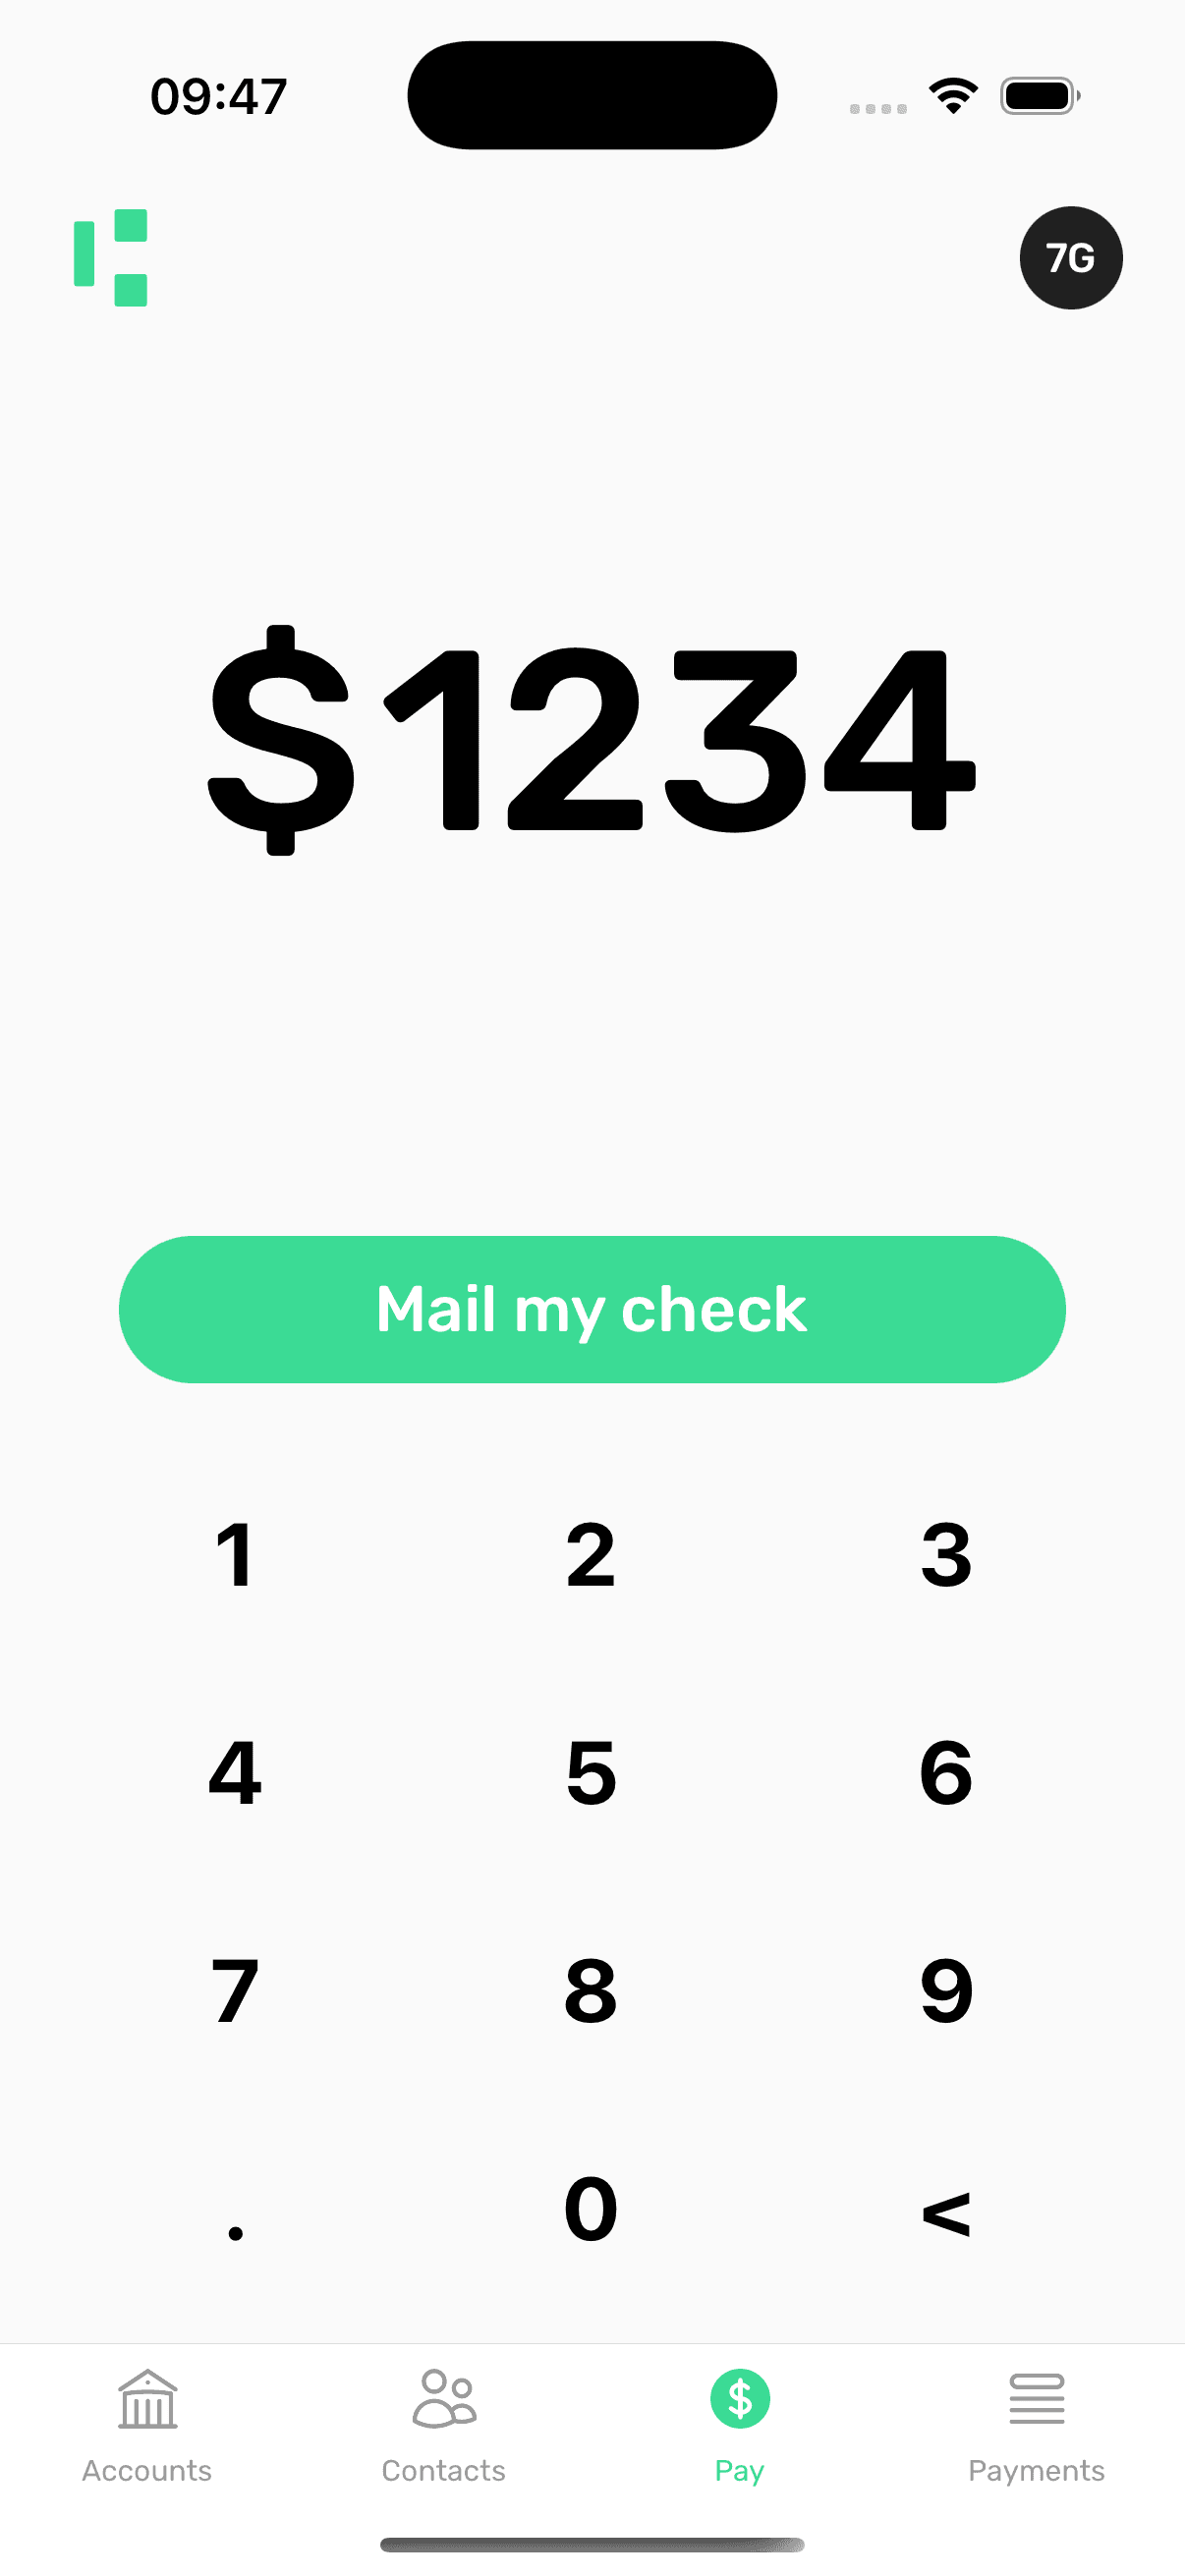
02Enter the payment amount.
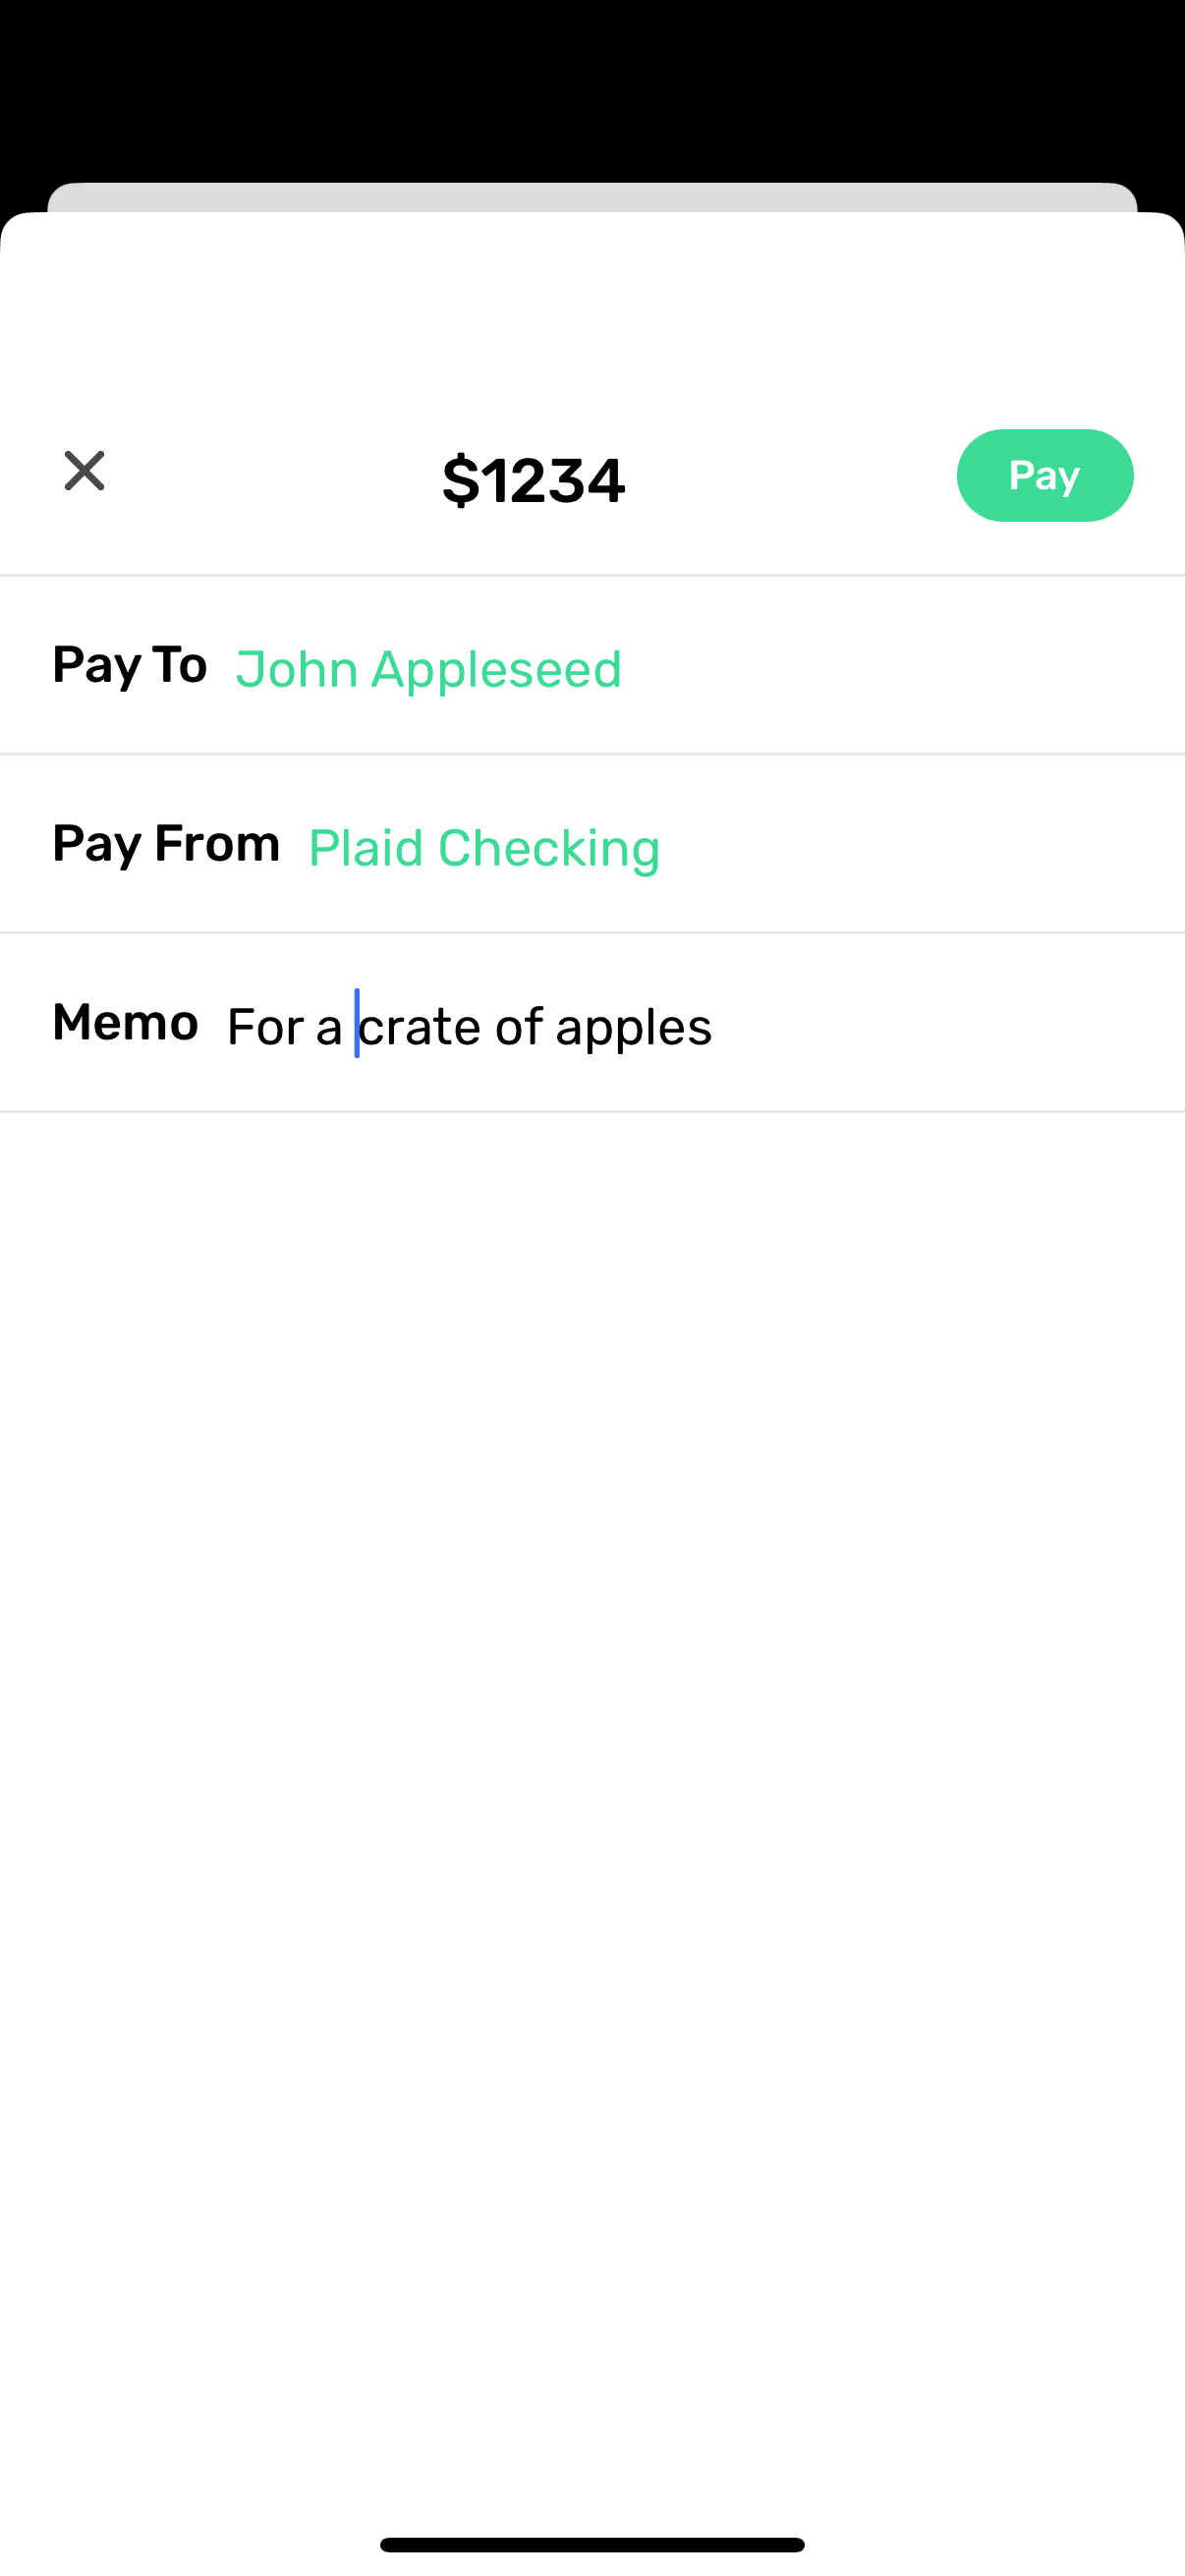
Open the Pay tab, type the amount you want to send, and tap Mail My Check.
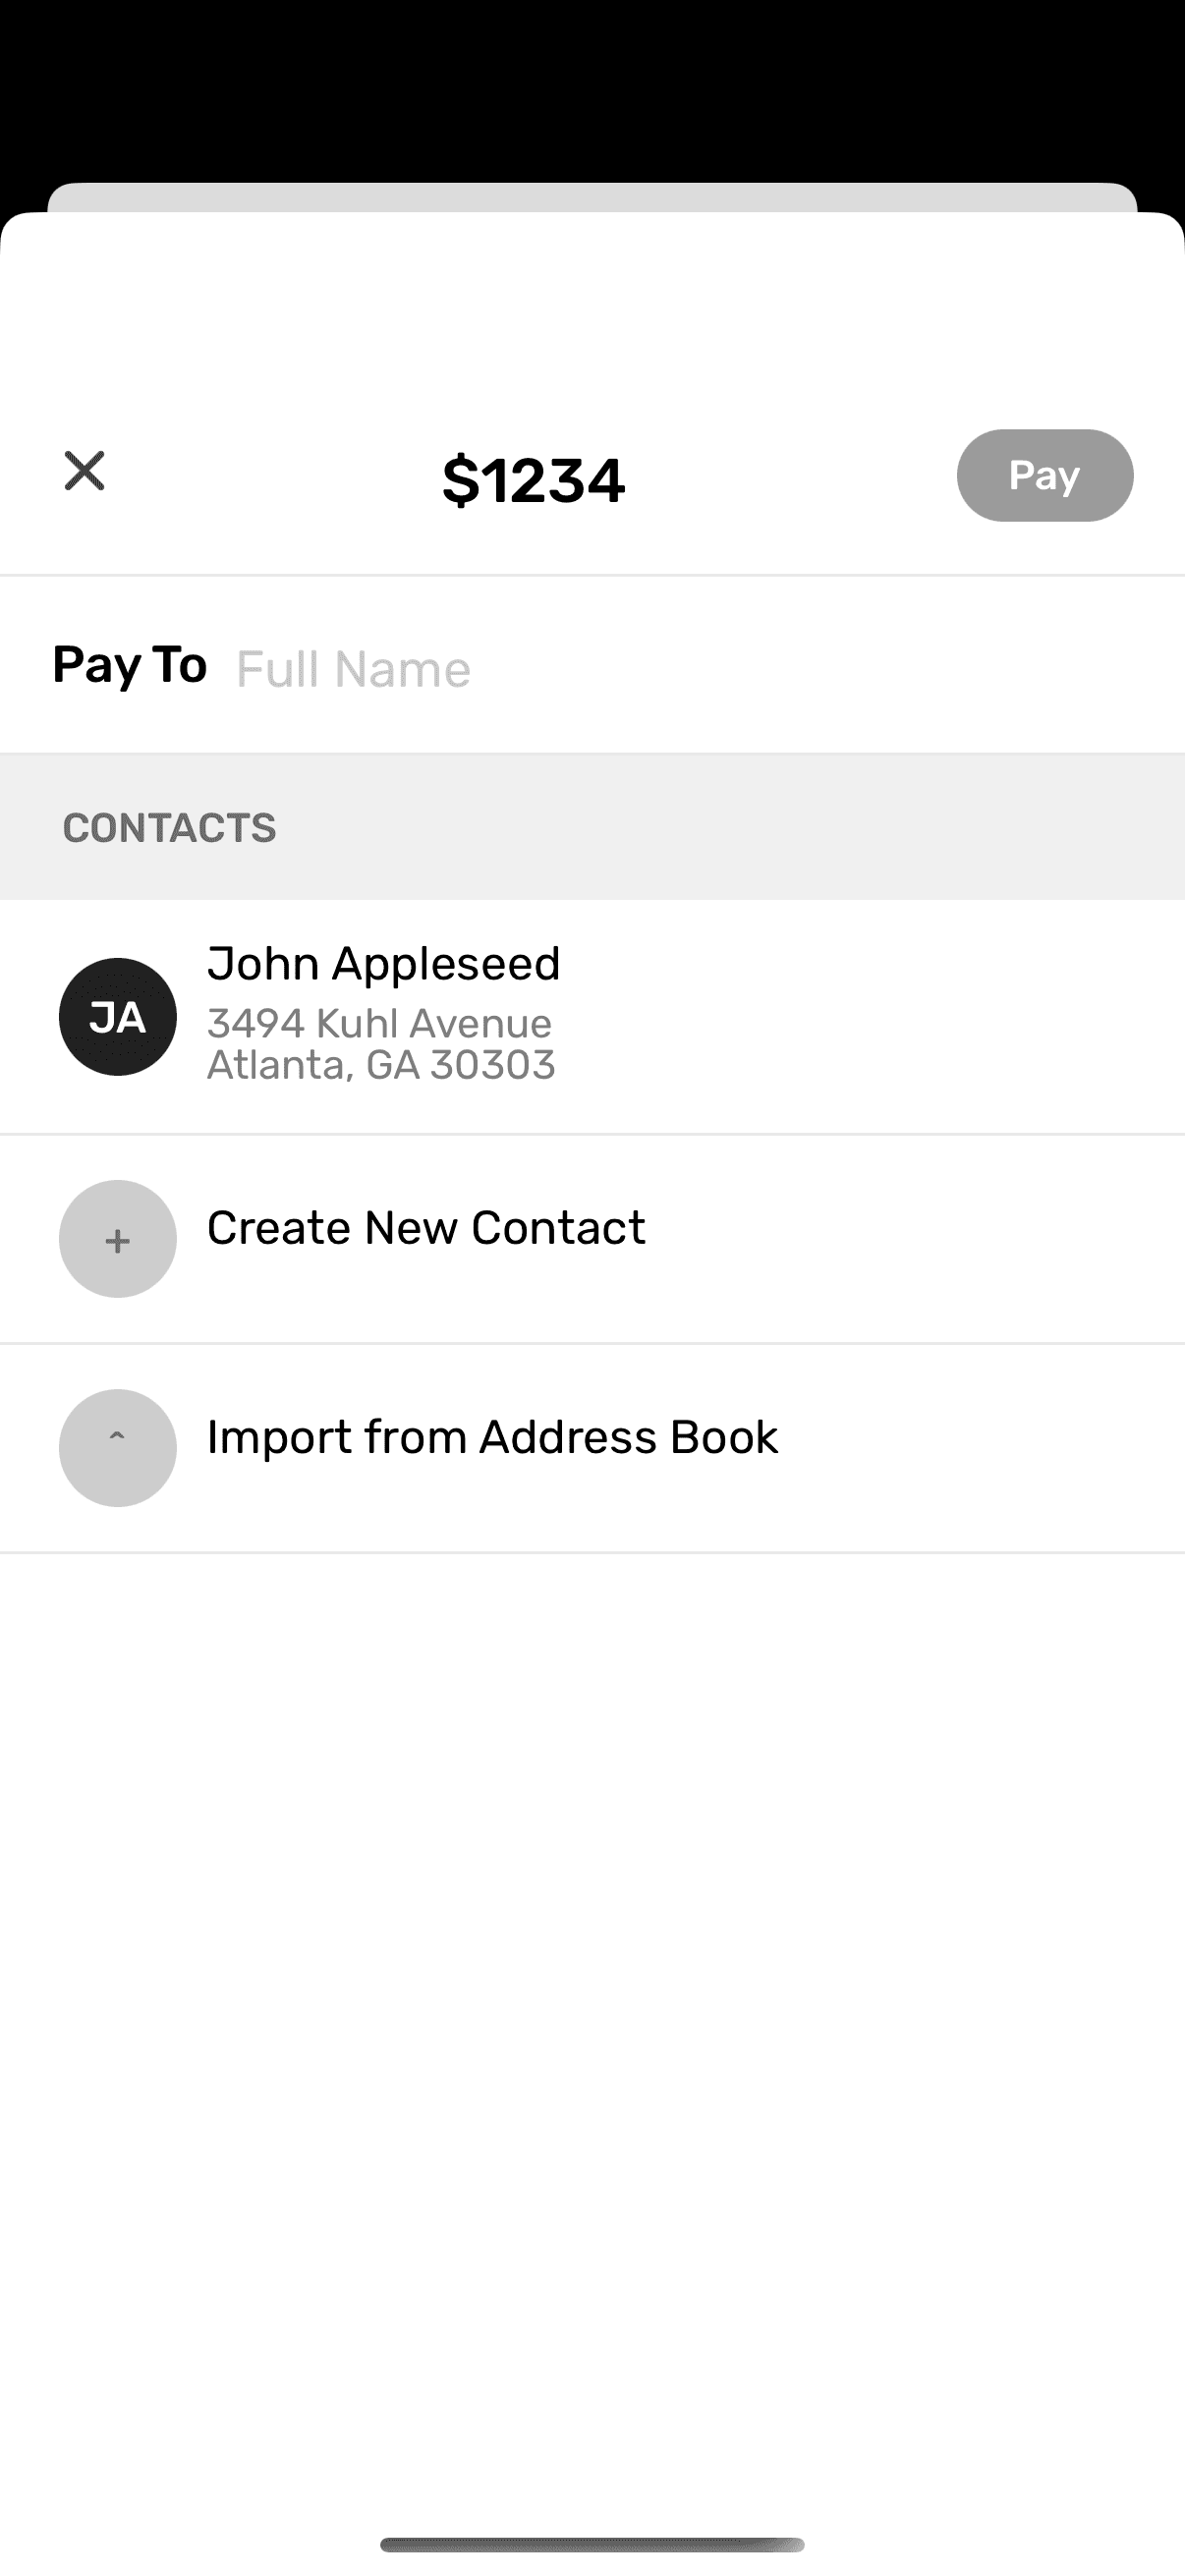
03Add the recipient.
Enter the recipient name and mailing address. You can type the address manually or import the recipient from your iPhone contacts.
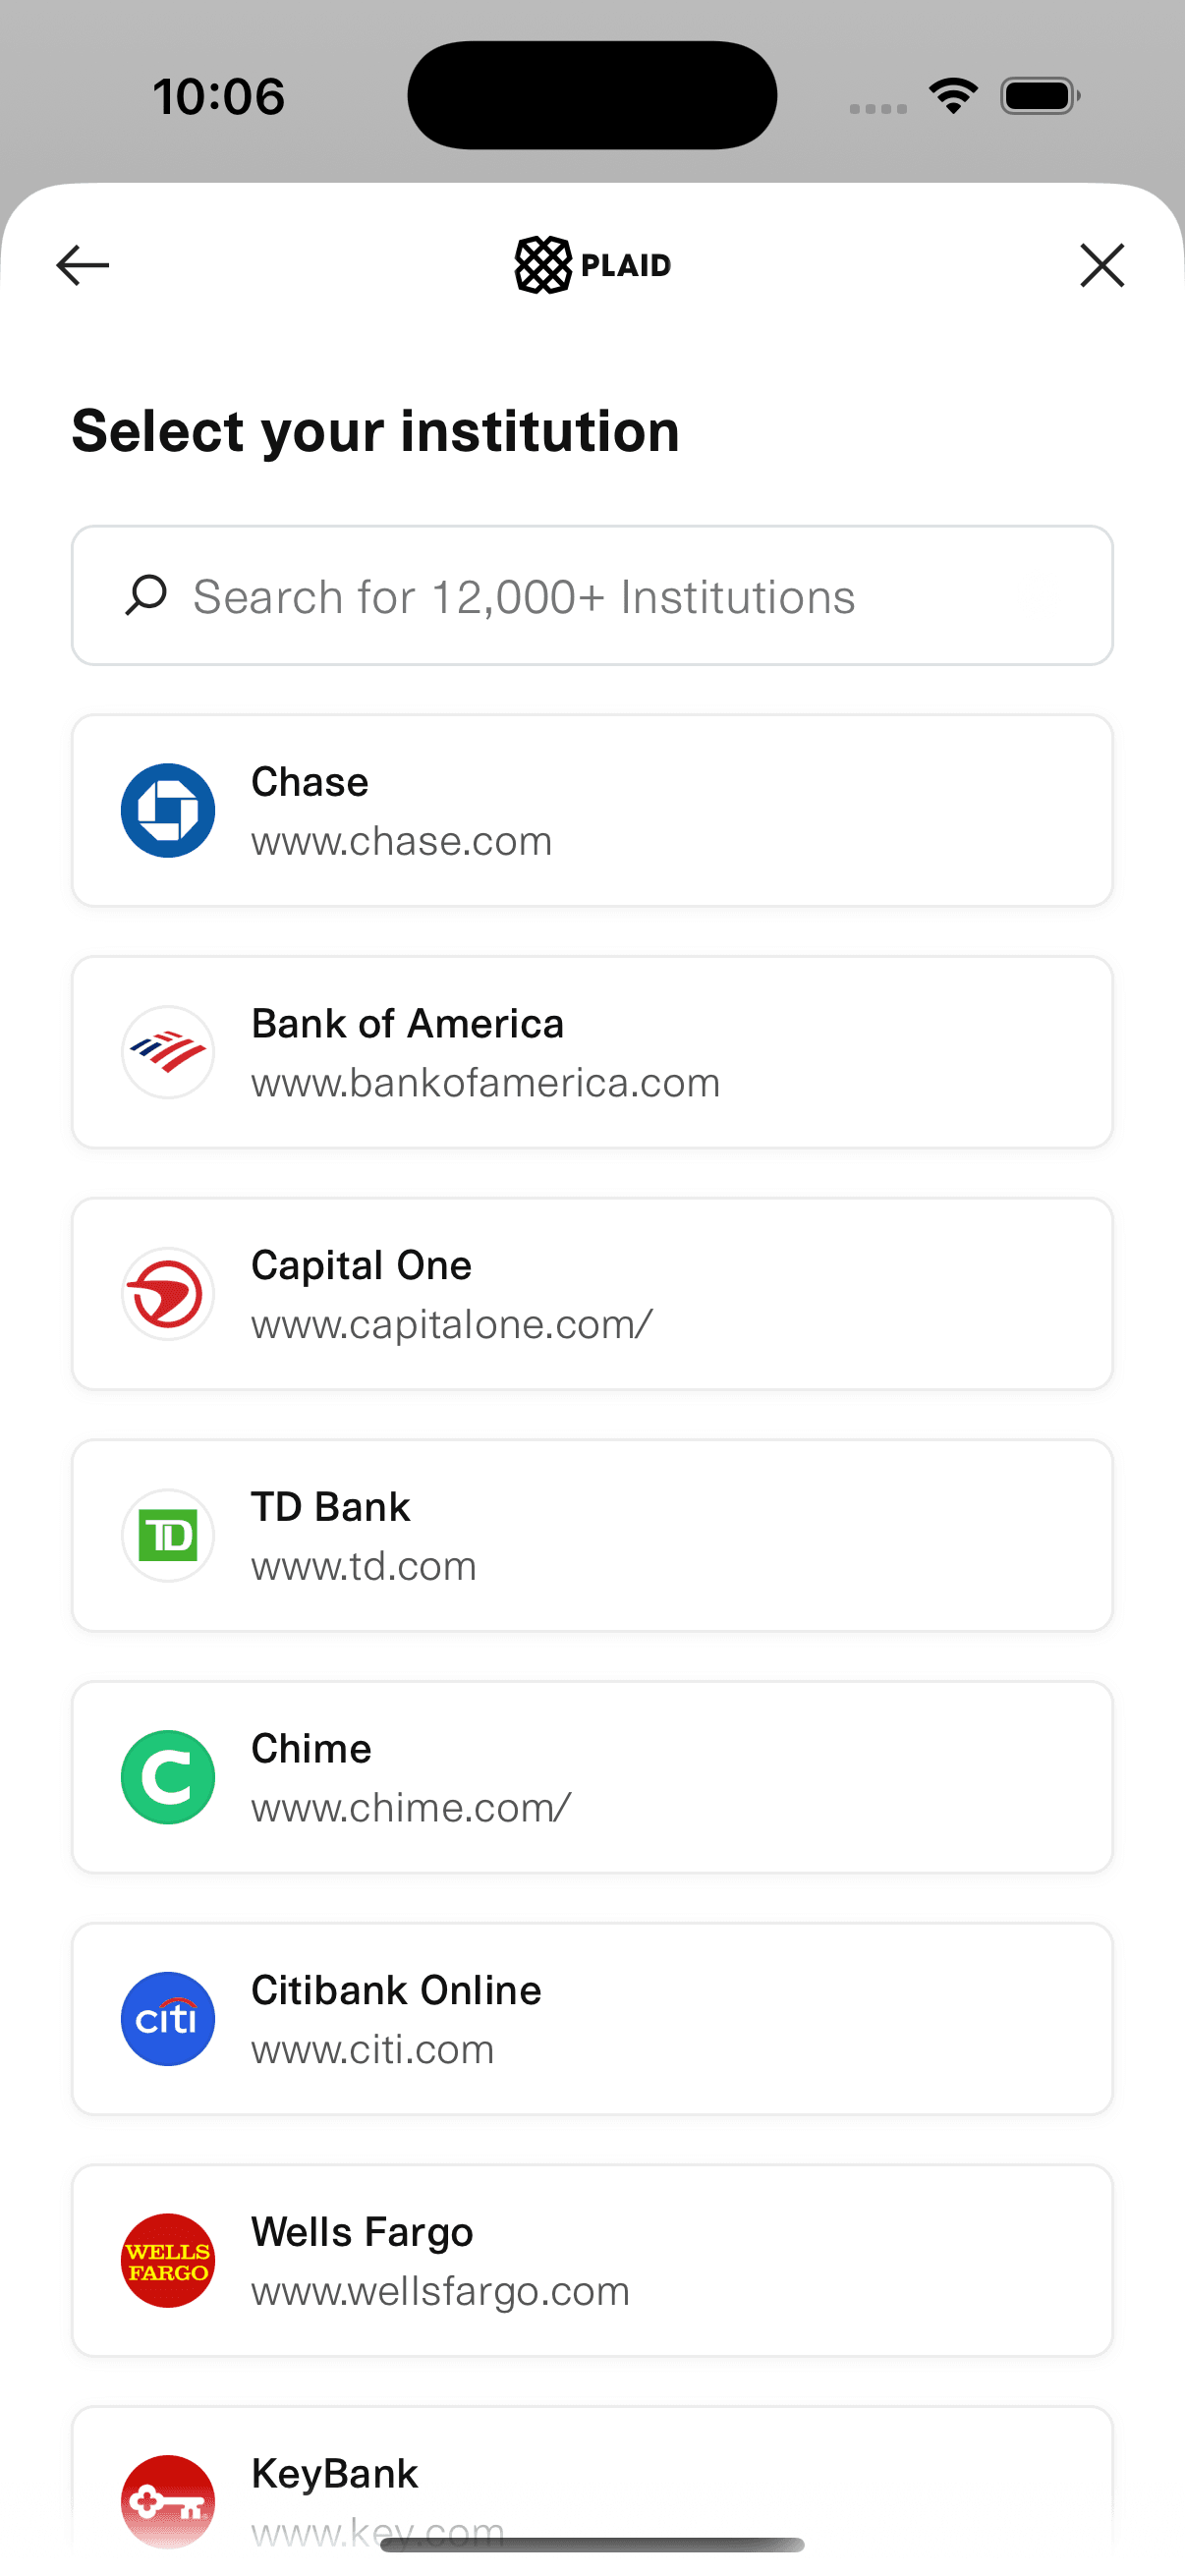
04Connect your bank account.
Connect a checking or money-market account securely with Plaid. Your credentials stay encrypted with Plaid, and Check Supply uses the verified account details only to print the check.
05Add an optional memo.
Add a memo or note if you want one printed on the check. This step is optional, but it can help the recipient apply the payment.
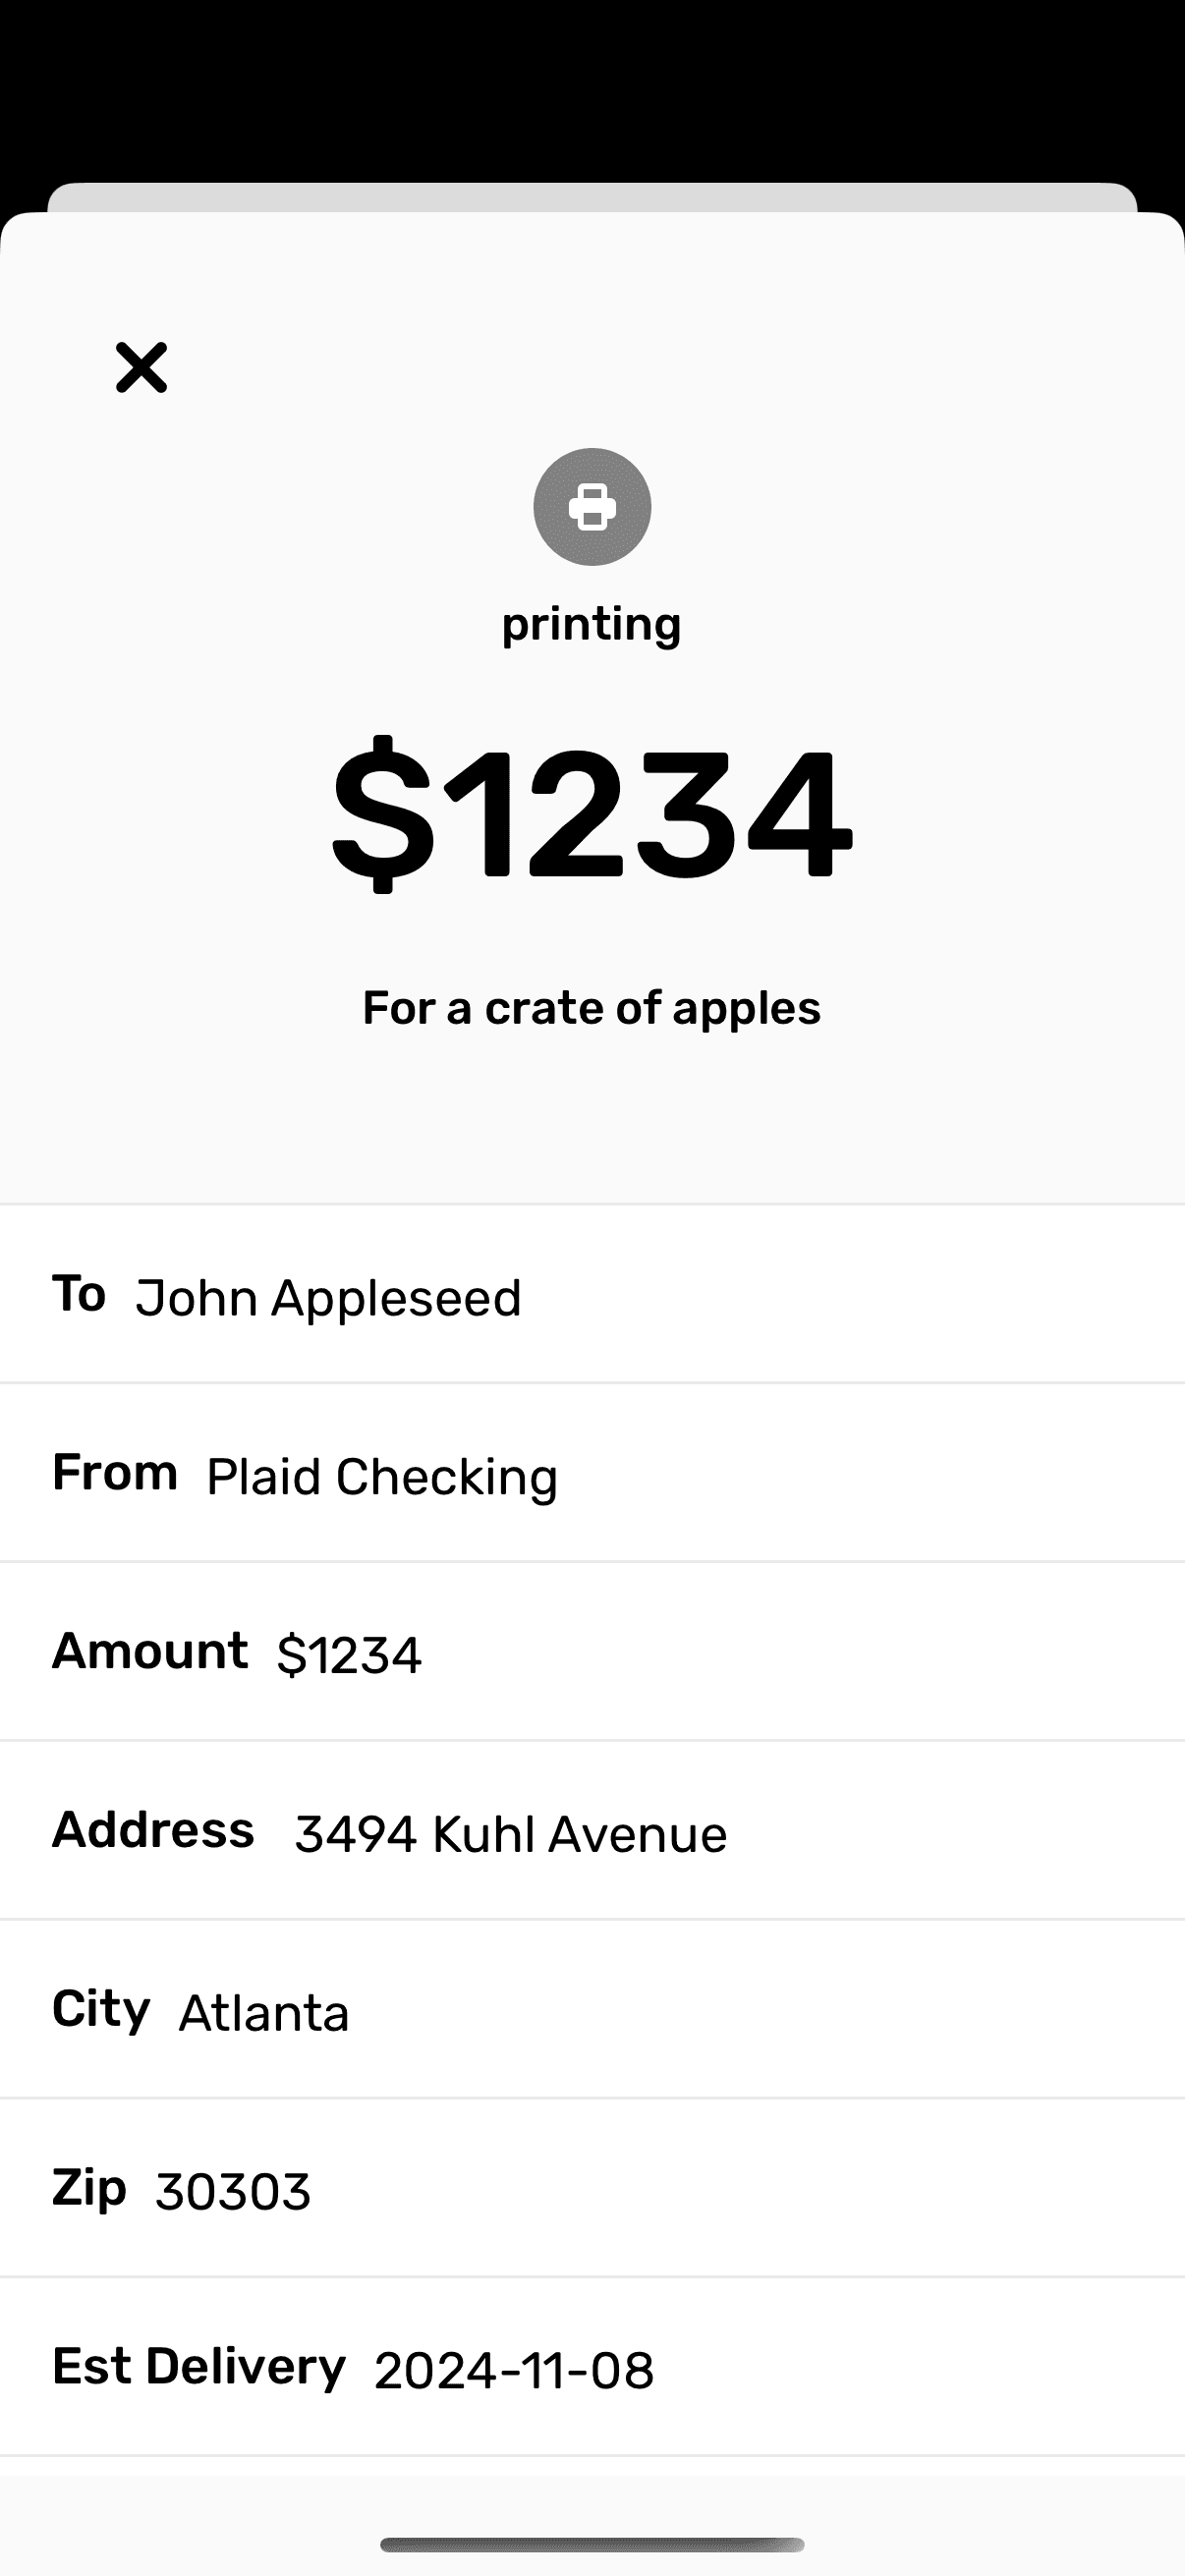
06Review and confirm.
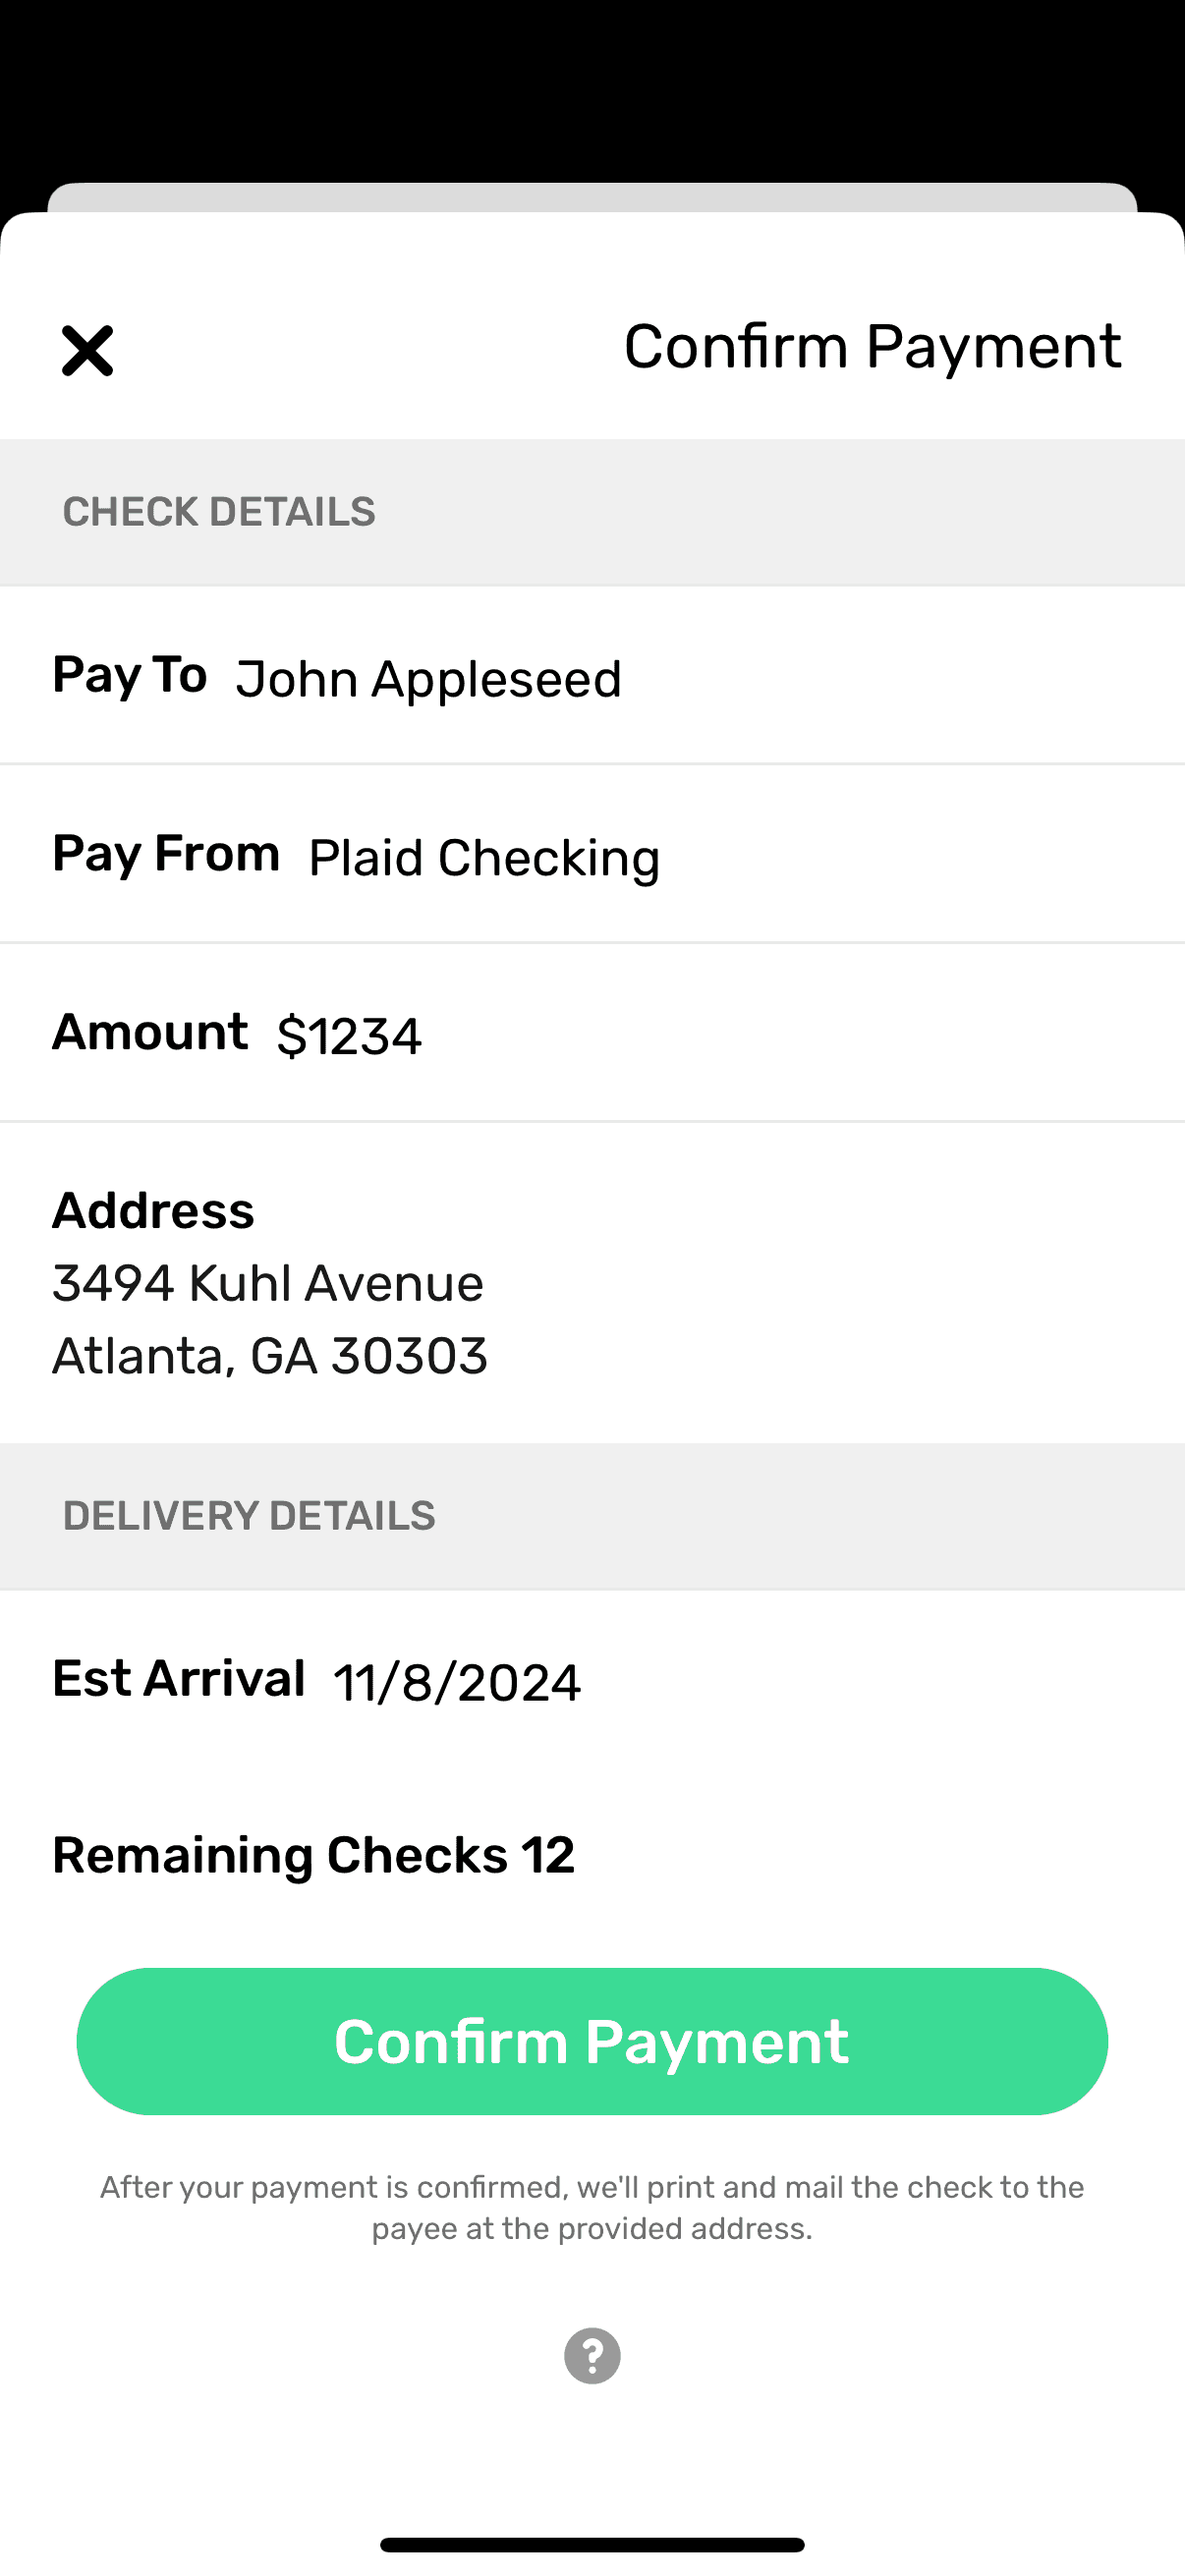
Review the recipient, amount, memo, delivery details, and total cost. If everything looks right, confirm the payment. Checks submitted before 3 PM ET on a business day can be printed and mailed the same day.
07Track your check.
Open the Payments tab to track status after the check is submitted. Most checks are delivered within 1-5 USPS business days, including Saturdays.